Arcitech Logistics provides expert shower valve, tub faucet, and shower system installation services throughout the Atlanta metro area, serving Gwinnett County, DeKalb County, Cobb County, Fulton County, and Forsyth County. Since 2015, our licensed plumbers have been installing and upgrading shower and tub faucets for homeowners across metro Atlanta, including single-handle shower valves, tub/shower combinations, thermostatic valves, pressure-balance valves, rain shower heads, handheld shower systems, Roman tub fillers, freestanding tub fillers, and complete custom shower systems. Whether you're replacing a leaking shower cartridge, upgrading to a thermostatic shower system with multiple spray heads, installing a luxurious rain shower, adding a handheld shower wand, or installing a statement freestanding tub filler, our experienced technicians ensure proper installation, code compliance, and years of reliable operation.
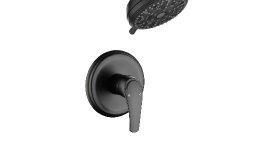
Shower and tub faucets are critical components combining safety (anti-scald protection), functionality (temperature and pressure control), and aesthetics (visible trim matching bathroom style). From basic builder-grade shower valves to luxury thermostatic systems with digital temperature control, from standard tub spouts to elegant freestanding tub fillers, we install all types with precision and attention to detail. Quality brands like Moen, Delta, Kohler, American Standard, Grohe, Hansgrohe, and luxury brands like Brizo and Riobel provide durability, safety features, and beautiful designs.
We serve residential clients throughout the greater Atlanta area, including Lawrenceville, Duluth, Marietta, Alpharetta, Cumming, Roswell, Johns Creek, Sandy Springs, Decatur, Smyrna, Stone Mountain, Tucker, Snellville, Lilburn, Norcross, Peachtree Corners, Sugar Hill, Buford, Suwanee, and Dacula.
Why Choose Arcitech Logistics
Why Choose Arcitech Logistics for Shower and Tub Faucet Installation:
✅ Licensed Plumbers - Certified for shower valve and tub faucet installation throughout Atlanta metro area
✅ Code Compliant - Anti-scald protection per Georgia plumbing code (pressure-balance or thermostatic valve required)
✅ All Major Brands - Install Moen, Delta, Kohler, American Standard, Grohe, Hansgrohe, Brizo, and Riobel
✅ Pressure-Balance Specialists - Proper anti-scald valve installation for safety and code compliance
✅ Thermostatic Valve Experience - Luxury temperature control systems with precise degree-accurate temperature
✅ Multi-Spray Systems - Body sprays, rain heads, and custom configurations for luxury shower experiences
✅ Freestanding Tub Fillers - Floor-mount and wall-mount filler installations for statement freestanding tubs
✅ Digital Shower Systems - Electronic temperature control setup and configuration
✅ Tile Repair Service - Professional tile cutting and replacement around valve installation areas
✅ Waterproofing Expertise - Proper sealing preventing water damage behind walls and under tile
✅ Complete Safety Testing - Thorough function, pressure, and anti-scald safety verification
✅ Same-Day Service - Often complete installation same day with no waiting
✅ 90-Day Workmanship Warranty - Stand behind our installation quality
✅ Experienced Since 2015 - Decade of shower valve and tub faucet expertise in Atlanta area
✅ All Faucet Types - From basic trim replacements to complete custom thermostatic systems
Requirements
Required Customer Preparation for Shower/Tub Faucet Installation:
1. Purchase shower/tub faucet before appointment (or contact us for recommendations) - ensure you have the valve, trim kit, shower heads, and all accessories
2. Verify correct valve type for your rough-in (pressure-balance or thermostatic, check existing rough-in depth)
3. For trim-only replacement: Verify new trim is compatible with your existing rough-in valve brand and model
4. For complete valve replacement: Clear access to shut-off valve (main shut-off or local shower shut-off)
5. For freestanding tub filler: Confirm floor/basement access available below tub location
6. Provide photos of current installation when scheduling (valve type, tub configuration, existing finish)
7. Clear bathroom of personal items providing full access to shower/tub area
8. Plan for water to be off 2-4 hours (longer for valve body replacement)
9. For complete valve replacement: Plan for shower out of service 24-48 hours (tile curing time)
10. Arrange alternate bathroom use if needed during installation
11. Have all components on-site before technician arrives (valve body, trim kit, shower heads, handheld, slide bar, tub spout, accessories)
12. Verify desired finish matches delivered product (chrome, brushed nickel, oil-rubbed bronze, matte black)
13. For multi-spray systems: Confirm water pressure adequate (minimum 45 PSI) - run multiple faucets simultaneously checking flow
14. For digital/smart systems: Ensure electrical outlet available near shower or electrician pre-installed wiring
15. Ensure clear access to main water shut-off valve location
16. Ensure adequate parking for service vehicle
17. Adult homeowner or authorized representative must be present during entire installation
18. For properties with HOA: Review any requirements for plumbing modifications
19. Review manufacturer installation instructions if available (note any special requirements)
20. Have payment method ready upon completion
Shower Only Systems: Standard Shower Valve with Fixed Head, Rain Shower Head Systems (8-16 inch overhead), Handheld Shower Systems with slide bar, Dual Shower Head Systems (fixed + handheld), Multi-Function Shower Systems (multiple spray heads + body sprays), Custom Shower Towers, Steam Shower Systems
Tub and Shower Combination Valves: Standard Tub/Shower Valve, Pressure-Balance Tub/Shower (anti-scald), Thermostatic Tub/Shower, Three-Function Diverter (tub spout + shower + handheld), Integrated Tub Filler/Shower Systems
Bathtub Faucets and Fillers: Deck-Mount Tub Fillers (Roman tub style), Wall-Mount Tub Fillers, Freestanding Tub Fillers (floor-mounted), Tub Spouts, Tub Spouts with Diverter, Clawfoot Tub Faucets, Waterfall Tub Fillers
Luxury and Specialty Systems: Thermostatic Valve with Volume Control, Body Spray Systems, Ceiling-Mount Rain Heads, LED Shower Heads, Rainfall/Waterfall Combination, Hand Shower with Slide Bar, Shower Panel Systems, Steam Generator Integration
Trim Kits and Upgrades: Shower Trim Kits (for existing rough-in), Tub Spout Replacements, Shower Head Upgrades, Diverter Valve Trim, Volume Control Trim, Cartridge Replacements
What's Included
Our comprehensive shower and tub faucet installation service includes:
Initial Consultation and Planning: Contact customer to schedule appointment. Verify faucet purchased or provide recommendations. Review valve type (pressure-balance, thermostatic, or standard). Verify rough-in valve already installed or new installation needed. Discuss shower head preferences (fixed, rain, handheld, multiple). For tub fillers: Verify tub type (alcove, freestanding, clawfoot, Roman tub). Discuss desired finish and special requirements. Verify water supply access and electrical requirements for digital systems.
Technician Arrival and Assessment: Arrive within scheduled appointment window. Inspect new shower/tub faucet components and verify all parts present. Assess bathroom and identify existing valve type and rough-in configuration. For trim-only: Verify rough-in valve compatible with new trim. Test water pressure and inspect shower arm and flange condition. Identify backer board behind tile and confirm rough-in measurements.
Water Supply Shutdown: Locate and turn off main water supply. Notify household members. Open lowest faucet draining system pressure. Open shower/tub faucet draining remaining water. Place bucket in tub catching residual water.
Existing Faucet Removal: Remove shower head, shower arm, and decorative escutcheon. Remove handle(s) from shower valve and cartridge. Photograph valve cartridge orientation before removal. For complete valve replacement: Access behind wall, disconnect supply lines, remove old valve body. Remove old tub spout and clean tile surface removing old caulk and silicone. Inspect wall cavity for water damage or mold.
New Valve Body Installation (if needed): Verify rough-in depth and install backer board. Position valve body at correct height (48" for shower, 28" for tub/shower). Level and secure valve body. Install pressure-balance or thermostatic cartridge. Connect hot and cold supply lines. Install drop ear elbow for shower arm. Test for leaks before closing wall.
Shower/Tub Trim Installation: Install valve cartridge into valve body. Apply silicone caulk to back of escutcheon. Slide escutcheon onto wall and install handle. Secure handle with set screw. Install shower arm with Teflon tape and tighten. Install shower head. For handheld systems: Install slide bar and connect handheld hose. Install tub spout with Teflon tape or set screw.
Multi-Spray System Installation (if applicable): Install body spray valve bodies at appropriate heights. Run supply lines from main valve to each spray location. Install rain shower head above shower area. Install diverter controls for selecting spray combinations. Test each spray independently.
Water Supply Restoration and Testing: Visually inspect all connections. Slowly restore water supply. Check all visible connections for leaks. Turn valve on, allow water to run clearing debris. Test temperature control and anti-scald protection. For tub/shower diverters: Test switching between tub spout and shower head. Test handheld and multi-spray systems.
Safety and Code Compliance: Verify pressure-balance or thermostatic valve installed (code required). Test anti-scald protection ensuring no temperature spikes. Verify maximum temperature setting (120°F maximum). Ensure all escutcheons properly sealed. Check accessibility standards if applicable. Document installation completion with photos.
Final Cleanup and Customer Education: Clean all fixtures and remove drop cloths. Demonstrate shower valve operation and temperature control. Explain pressure-balance anti-scald feature. Show tub/shower diverter operation. Provide manufacturer warranty information and care instructions. Verify customer completely satisfied with installation.
Specifications & Safety
Shower and Tub Faucet Technical Specifications:
Valve Types and Rough-In Specifications:
- Pressure-Balance Valve: ASSE 1016 compliant, 1/2-inch inlets, 1/2-inch outlets, rough-in depth typically 3-4 inches from stud face
- Thermostatic Valve: ASSE 1016/1069 compliant, maintains temperature within +/- 2 degrees F, 1/2-inch or 3/4-inch inlets depending on model
- Standard Shower Rough-In Height: 48 inches from floor to valve center (typical)
- Tub/Shower Valve Rough-In Height: 28-32 inches from floor (above tub rim approximately 4-8 inches)
- Tub Spout Height: 4 inches above tub rim (typical deck/alcove tub)
- Shower Arm Height: 72-78 inches from floor (standard), adjustable based on user preference
- Drop Ear Elbow: Must be attached to blocking or backer board (minimum 3/4-inch plywood)
Water Pressure Requirements:
- Minimum Operating Pressure: 20 PSI
- Recommended Operating Pressure: 40-80 PSI
- Optimal Pressure for Single Shower Head: 40-60 PSI
- Minimum for Multi-Spray Systems: 45 PSI
- Minimum for Large Rain Heads (12+ inches): 50 PSI
- Maximum Recommended: 80 PSI (install pressure regulator if above 80 PSI)
Supply Line Specifications:
- Standard Supply Size: 1/2-inch IPS (Iron Pipe Size)
- Materials: Copper (type L or M), PEX, CPVC
- Hot Water: Left inlet (per code)
- Cold Water: Right inlet (per code)
- Minimum Hot Water Temperature at Water Heater: 120°F (maintains temperature through long runs)
Flow Rate Specifications:
- Standard Shower Head: 2.0 GPM (gallons per minute) - WaterSense certified
- High-Flow Shower Head: 2.5 GPM (pre-2011 standard)
- Rain Shower Head (8-inch): 2.0-2.5 GPM
- Rain Shower Head (12-inch+): 2.5-3.0 GPM
- Body Spray: 0.5-1.0 GPM each
- Typical 3-Body Spray System: 1.5-3.0 GPM total additional
- Handheld Shower: 1.5-2.0 GPM
Valve Body Installation Requirements:
- Backer Board: 3/4-inch plywood minimum between studs
- Mounting Hardware: Screws into backer board (not drywall)
- Flush Mounting: Valve mounting ears must be flush with finished wall surface
- Code Compliance: ASSE 1016 pressure-balance or ASSE 1069 thermostatic required
Temperature Specifications:
- Maximum Safe Shower Temperature: 120°F (per code)
- CPSC Recommended: 120°F maximum at fixture
- Temperature Limit Stop: Factory set, adjustable during installation
- Thermostatic Valve Accuracy: Maintains set temperature within +/- 2°F
- Anti-Scald Response: Pressure-balance reacts within 0.5 seconds to pressure changes
Additional Charges
Potential Additional Charges for Shower and Tub Faucet Installation:
Complete Valve Replacement - $375-$650: Installing new valve body behind wall. Includes drywall/tile cutting, valve rough-in, wall repair, and trim installation.
Thermostatic Valve Upgrade - Add $225-$395: Upgrading from pressure-balance to thermostatic valve for precise temperature control.
Multi-Spray System - $550-$950: Installing body sprays, rain head, and multiple spray heads with diverter controls.
Freestanding Tub Filler - $475-$850: Floor-mounted tub filler requiring floor access and supply line routing.
Digital Shower System - $375-$650: Installing electronic temperature control with digital display (includes electrical connection).
Tile Repair - $125-$275: Cutting and replacing tile around valve installation area.
Waterproofing Repair - $175-$325: Repairing shower pan liner or waterproof membrane if damaged during installation.
Pressure Regulator Installation - $275-$425: Installing pressure regulator if water pressure exceeds 80 PSI (protects cartridges).
Permit Fees - $100-$150: Permit and inspection coordination for complete valve body replacement installations.
Emergency or Same-Day Service - Additional $75-$150: For urgent installations outside normal scheduling windows.
Our Professional Process
Our Shower and Tub Faucet Installation Process:
Step 1 - Schedule and Consultation: Contact us to schedule your installation. Provide photos of existing installation if possible. We discuss valve type (pressure-balance vs thermostatic), faucet style, finish, and special requirements. We confirm all components are on-site before appointment.
Step 2 - Arrival and Assessment: Technician arrives within scheduled window. We inspect new faucet components, verify all parts present, and assess the existing installation. We identify valve type, rough-in configuration, and plan the installation approach. We discuss any unexpected issues before proceeding.
Step 3 - Water Shutdown: We locate and shut off main water supply (or local shut-off if available). Household members notified. System drained through lowest faucet and shower/tub valve to ensure dry work environment.
Step 4 - Existing Faucet Removal: Systematic removal of shower head, arm, escutcheon, handles, and cartridge. For complete valve replacement: Access behind wall, disconnect supply lines, and remove old valve body. Clean tile surface removing old caulk, plumber's putty, and mineral deposits.
Step 5 - New Valve Installation (if needed): Install new valve body at proper height and orientation. Connect hot and cold supply lines. Install drop ear elbow for shower arm. Test for leaks before closing wall. Repair drywall or tile and allow adhesive to cure (24-48 hours if applicable).
Step 6 - Trim and Fixture Installation: Install valve cartridge, escutcheon with silicone seal, and handle. Install shower arm and shower head. For handheld systems: Mount slide bar and connect handheld hose. Install tub spout. For multi-spray systems: Install body spray valve bodies, supply lines, rain head, and diverter controls.
Step 7 - Water Restoration and Testing: Restore water supply slowly. Check all connections for leaks. Test temperature control and anti-scald protection. For pressure-balance valves: Verify temperature doesn't spike when toilet is flushed. For thermostatic valves: Set temperature and verify consistency. Test all spray functions and diverter operation.
Step 8 - Safety and Code Compliance Verification: Verify code-required anti-scald protection (pressure-balance or thermostatic valve). Test maximum temperature not exceeding 120°F. Verify all escutcheons properly sealed. Check accessibility standards if applicable. Document installation with photos.
Step 9 - Cleanup and Customer Education: Clean all fixtures, remove protective coverings, and restore bathroom. Demonstrate valve operation, temperature control, and anti-scald feature. For multi-spray systems: Show each spray and diverter control. Provide manufacturer warranty documents and care instructions. Confirm customer satisfaction.
Step 10 - Follow-Up Support: Arcitech Logistics available for any questions after installation. 90-day workmanship warranty on all our installations. Contact us for any issues with temperature control, leaks, or faucet operation.
Preparation
How to Prepare for Your Shower and Tub Faucet Installation Appointment:
Before the Day of Installation:
- Purchase your shower/tub faucet, trim kit, shower heads, and all accessories - have everything on-site before appointment
- For trim-only replacement: Verify new trim is compatible with your existing rough-in valve (check brand and model number)
- For complete valve replacement: Locate your main water shut-off valve and ensure it's operational
- For freestanding tub filler: Confirm basement/crawl space floor access is available below tub location
- Take photos of existing installation and share when scheduling (helps technician prepare correct tools and parts)
- Check water pressure by running multiple faucets - for multi-spray systems, minimum 45 PSI required
- For digital/smart shower systems: Ensure electrical outlet or pre-installed wiring is available near shower location
- Verify desired finish (chrome, brushed nickel, oil-rubbed bronze, matte black) matches all bathroom fixtures
- Check that all valve and trim components ordered are from compatible product lines
Day of Installation:
- Clear all personal items from shower/tub area providing full access
- Clear path from entrance to bathroom for technician and equipment
- Ensure adequate parking for service vehicle
- Adult homeowner or authorized representative must be present entire time
- Plan for household water to be off for 2-4 hours (longer for complete valve replacement)
- For complete valve replacement: Plan shower out of service 24-48 hours for tile curing
- Arrange use of alternate bathroom if needed
- Have all components, parts, and accessories organized in one location
- Keep manufacturer installation instructions available if you have them
- Notify all household members water will be shut off during installation
Testing & Quality Assurance
Shower and Tub Faucet Installation Testing and Verification Protocol:
Leak Testing:
- Visual inspection of all connections before water restoration
- Slow water pressure restoration monitoring for leaks
- For valve body replacements with accessible connections: Inspect each connection under pressure
- For sealed walls: Monitor adjacent areas for signs of leaking (ceiling below, wall cavities)
- Check all escutcheon seals and shower arm connection for weeping
- Test all tub spout connections at wall for dripping
- Run full water pressure for minimum 5 minutes checking all connections under load
Temperature and Anti-Scald Testing:
- Turn valve from full cold to full hot verifying smooth temperature transition
- Measure hot water temperature at fixture verifying not exceeding 120°F maximum
- For pressure-balance valves: Run shower at comfortable temperature, flush toilet - verify temperature remains constant (no temperature spike)
- For thermostatic valves: Set temperature, verify maintained despite pressure changes from other fixtures
- Adjust temperature limit stop if hot water exceeds safe limits
- Verify handle off position completely stops water flow (no dripping)
Function Testing:
- Test handle operation through full range verifying smooth operation without binding
- For tub/shower combination: Test diverter valve switching between tub spout and shower head
- Verify tub spout fully shuts when shower mode active
- Test diverter multiple times ensuring reliable and complete switching
- For handheld shower systems: Test handheld spray at all angle positions
- Verify handheld holder securely mounted supporting spray weight
- Test hose flexibility and verify adequate length (minimum 60 inches recommended)
- For multi-spray systems: Test each spray independently verifying full flow
- Test all spray combinations checking for adequate pressure at each
- For digital/smart systems: Test temperature presets and verify digital display accuracy
- Verify all volume controls operate smoothly
Final Verification:
- Verify all handles, spray heads, and components securely attached (no wobbling)
- Check finish quality with no scratches, chips, or defects
- Verify all caulk lines clean and consistent
- Confirm shower arm properly positioned (not twisted, aimed correctly)
- Test rain shower head spray pattern coverage
- Customer demonstration and sign-off on completed installation
Service Areas
We provide professional shower and tub faucet installation throughout the Atlanta metro area:
Gwinnett County: Lawrenceville, Duluth, Norcross, Lilburn, Snellville, Grayson, Loganville, Dacula, Buford, Suwanee, Sugar Hill, Peachtree Corners, Berkeley Lake
Fulton County: Atlanta, Alpharetta, Roswell, Sandy Springs, Johns Creek, Milton, East Point, College Park, Fairburn
Forsyth County: Cumming
Serving all five counties with consistent, professional shower valve, tub faucet, and shower system installation services across the entire Atlanta metro region since 2015.
Coverage Details
Shower and Tub Faucet Installation Service Coverage Area:
Primary Service Counties:
- Gwinnett County, Georgia
- DeKalb County, Georgia
- Cobb County, Georgia
- Fulton County, Georgia
- Forsyth County, Georgia
Fulton County: Atlanta, Alpharetta, Roswell, Sandy Springs, Johns Creek, Milton, East Point, College Park, Fairburn, Union City, Hapeville, Palmetto
Forsyth County: Cumming, Ball Ground (border area), Canton (border area)
Service Availability:
- Monday through Saturday service
- Same-day service available when schedule permits
- Weekend appointments available
- Emergency service available for urgent situations (additional charges may apply)
Contact us to confirm service availability in your specific location: (678) 656-9246
Frequently Asked Questions
Frequently Asked Questions - Shower and Tub Faucet Installation:
Q: What's the difference between pressure-balance and thermostatic shower valves?
A: Pressure-balance valves (most common, $150-$300) prevent scalding by balancing hot/cold pressure when toilet flushes or dishwasher runs - code required in most jurisdictions. Thermostatic valves (luxury option, $350-$800) maintain exact set temperature within 1-2 degrees using a thermostatic element, with separate volume control. Our recommendation: Pressure-balance adequate for most homes. Thermostatic worth upgrading for luxury showers, households with young children/elderly, or multi-spray systems.
Q: Can you install a rain shower head on my existing shower?
A: Yes! Rain shower head retrofits are common. Wall-mount with extension arm: $125-$275 installed (simpler, uses existing valve). Ceiling-mount: $375-$550 installed (more dramatic, requires plumbing relocation). Requirements: Adequate ceiling height, minimum 40 PSI water pressure (50+ PSI ideal for larger heads). We recommend 10-inch rain head for good balance of coverage and water efficiency.
Q: How do you install a freestanding tub filler?
A: Floor-mounted freestanding fillers require cutting floor access hole, running hot/cold supply lines through floor joists to faucet location, installing shut-off valves for maintenance access, and mounting filler securely through subfloor. Wall-mounted fillers run supply lines in wall cavity. Cost: $475-$850 installed depending on floor access difficulty and distance to supply lines.
Q: Can you add body sprays to my existing shower?
A: Yes, but it involves significant work: removing tile at body spray locations, installing valve bodies at proper heights (typically 24", 42", 60"), running supply lines from main valve, replacing tile, and waterproofing. Requires minimum 45 PSI water pressure, thermostatic valve recommended, and adequate hot water heater capacity. Cost: $550-$950 installed including tile repair.
Q: Do I need a permit to replace my shower valve?
A: Trim-only replacement (handles, shower head, tub spout - no wall opening): Usually NO permit required. Valve body replacement (opening wall, replacing valve behind tile): Typically YES in Gwinnett, Fulton, and DeKalb Counties. We handle permit process for installations requiring permits ($100-$150 additional for permit fees and inspection coordination).
Q: How long does shower/tub faucet installation take?
A: Trim-only replacement: 1-1.5 hours. Cartridge replacement: 1-2 hours. Complete valve replacement (with tile repair): 4-6 hours plus 24-48 hours tile curing before use. Freestanding tub filler: 3-5 hours. Multi-spray system: 6-8 hours plus tile curing. We schedule based on complexity and communicate timeline adjustments if unexpected issues arise.
Q: What causes shower valves to leak and should I repair or replace?
A: Most common cause: worn cartridge (constant dripping when off) - repair by replacing cartridge ($145-$225). Damaged valve body requires complete replacement ($375-$650). Repair makes sense for valves under 15 years old with quality brands (Moen, Delta, Kohler). Replace if valve is 20+ years old, budget brand with no parts, or taking opportunity to upgrade to pressure-balance (now code required).
Q: Can you install a handheld shower in addition to my fixed shower head?
A: Yes! Most popular option: Install three-way diverter valve replacing existing shower valve with positions for fixed head only, handheld only, or both simultaneously. Run supply line to slide bar and connect handheld hose. Alternative: Replace existing shower head with combo unit having built-in diverter (simpler, less expensive but can't run both simultaneously). Cost: $145-$325 depending on approach.
Q: What brands do you install?
A: We install all major brands: Moen (PosiTemp, ExactTemp), Delta (Monitor, Temp2O), Kohler (Rite-Temp, luxury thermostatic), American Standard, Grohe, Hansgrohe, Brizo, Riobel, Pfister, and more. We're brand-agnostic and install whatever you've purchased from any retailer.
Q: What's your warranty on shower/tub faucet installation?
A: We provide a 90-day workmanship warranty on all our installations. If any issues arise from our installation workmanship within 90 days, we return to resolve at no charge. Manufacturer warranties on the faucet products themselves are separate and vary by brand (typically 5-lifetime on cartridges and finish).
Service Areas
We provide Shower & Tub Faucet Installation Atlanta - Professional Shower Valve & Bathtub Faucet Installation Services throughout the Atlanta Metro area including:
Gwinnett County
Lawrenceville
Duluth
Suwanee
Buford
Norcross
Lilburn
Snellville
DeKalb County
Decatur
Dunwoody
Tucker
Stone Mountain
Chamblee
Brookhaven
Cobb County
Marietta
Smyrna
Kennesaw
Acworth
Powder Springs
Austell
Fulton County
Atlanta
Alpharetta
Sandy Springs
Roswell
Johns Creek
Milton
Forsyth County
Cumming
Suwanee
Contact Information
Contact Arcitech Logistics for Shower and Tub Faucet Installation:
Ready for professional shower or tub faucet installation? Upgrade your bathroom with reliable, code-compliant plumbing installed by licensed professionals.
Serving Gwinnett, DeKalb, Cobb, Fulton, and Forsyth Counties since 2015. Licensed plumbers, code-compliant installations, same-day service available. Call now to schedule your shower or tub faucet installation!
When you call or email, please have ready:
- Type of faucet service needed (trim replacement, cartridge, complete valve, freestanding filler, etc.)
- Brand and model of new faucet (if already purchased)
- Photo of existing installation (helpful for compatibility assessment)
- Your city/county location
- Preferred appointment dates and times
We respond to all inquiries promptly and typically schedule within 1-3 business days for non-emergency installations.
Next Steps
Next Steps After Your Shower and Tub Faucet Installation:
Immediately After Installation:
1. Test all functions your technician demonstrated - temperature control, diverter, handheld, and all spray settings
2. Verify water temperature feels comfortable and safe (should not exceed 120°F)
3. Check all areas around installation for any signs of leaking (dry tile, no moisture)
4. Review warranty documents and save manufacturer warranty registration information
5. Register your product warranty with the manufacturer (most done online, extends warranty coverage)
First 24-48 Hours:
- For complete valve replacement with tile work: Do NOT use shower until tile and grout fully cure (24-48 hours minimum)
- Allow silicone caulk around escutcheons to fully cure (24 hours) before heavy water exposure
- Monitor under-sink or adjacent areas for any signs of moisture indicating leak
First 30 Days:
- Re-check all connections and caulk lines after initial use period
- Verify temperature control still accurate and comfortable
- Ensure handles and shower head still securely attached
- Contact Arcitech Logistics immediately if any dripping, temperature issues, or loose components noted
Ongoing Maintenance (Monthly/Quarterly):
- Clean shower head monthly to prevent mineral buildup (soak in white vinegar if clogged)
- Wipe fixtures after use to prevent water spots, especially on special finishes
- For specialty finishes (oil-rubbed bronze, matte black): Use only mild soap and water - no abrasive cleaners
- Inspect caulk around escutcheons and tub/shower surround annually - recaulk if any gaps or discoloration
- Check diverter function quarterly to verify complete switching between tub and shower
Annual Maintenance:
- Inspect shower arm and escutcheon for any signs of corrosion or loosening
- Check tub spout connection at wall for any gap or movement
- Inspect handheld hose for cracks or wear (typically replace every 3-5 years)
- Consider annual plumbing inspection to catch any developing issues early
Contact Arcitech Logistics:
- For warranty service within 90 days: Call (678) 656-9246 - we return at no charge
- For cartridge replacement after warranty: Typical cartridge life 5-10 years
- For upgrades: Thermostatic valve upgrade, rain head addition, or handheld addition available anytime
- (678) 656-9246 | arcitechlogistics@gmail.com
Ready to Book?
Call or text us — we're available Mon–Sat, 8am–6pm.
Thank you for choosing Arcitech Logistics for your shower/tub faucet installation!
A properly installed shower valve provides safe, consistent water temperature for years of reliable service.
Before installation:
- Verify wall/tile access if replacing valve body
- Confirm water pressure adequate (especially for multi-spray systems)
- Plan alternate bathroom use during installation
- Have all components on-site (valve, trim, shower heads)
During installation:
- Household water will be off during work
- Wall/tile opening if replacing valve body
- Tile must cure 24-48 hours before use (if applicable)
- Complete testing ensures safe operation
After installation:
- Test anti-scald protection monthly
- Clean shower heads quarterly preventing mineral buildup
- Wipe fixtures after use preventing water spots
- Contact us immediately if temperature control issues arise
Questions before your appointment? Call us at (678) 656-9246
We look forward to installing your shower or tub faucet with professional quality!
Arcitech Logistics
Professional Plumbing Services Since 2015
Ready to Schedule Your Shower & Tub Faucet Installation Atlanta - Professional Shower Valve & Bathtub Faucet Installation Services?
Same-day service available across the Atlanta Metro area. Licensed & insured — satisfaction guaranteed.