Home Services Appliance Installation

Professional Dryer Duct Installation in Atlanta Metro Area

Starting at $250
Licensed & Insured Satisfaction Guaranteed Same-Day Available
Professional Dryer Duct Installation in Atlanta Metro Area

Service Description

Arcitech Logistics provides expert dryer duct installation services throughout the Atlanta metro area, serving Gwinnett County, DeKalb County, Cobb County, Fulton County, and Forsyth County. Since 2015, our professionals have been installing dryer exhaust ductwork for homeowners across metro Atlanta, including electric dryer venting, gas dryer exhaust systems, rigid metal duct installation, second-floor dryer venting, closet dryer installations, and dryer vent rerouting during laundry room remodels. Whether you're replacing dangerous flexible plastic duct with code-compliant rigid metal, installing exhaust for new dryer location, routing duct through multiple floors or long horizontal runs, or repairing lint-clogged ductwork reducing efficiency, our experienced technicians ensure code-compliant installation, proper duct sizing, shortest routing paths, lint-resistant configurations, and safe, efficient dryer operation.

Proper dryer ducting is critical for safety (preventing lint fires), efficiency (reducing drying times and energy costs), and appliance longevity. From simple 4-inch rigid aluminum duct to complex multi-story installations with fire dampers and multiple elbows, we install all types of dryer exhaust ductwork following manufacturer specifications, building codes, and best practices. Quality rigid metal duct materials, smooth interior construction, minimal elbows, proper exterior terminations, and regular maintenance access ensure efficient, safe, code-compliant operation.

We serve residential clients throughout the greater Atlanta area, including Lawrenceville, Duluth, Marietta, Alpharetta, Cumming, Roswell, Johns Creek, Sandy Springs, Decatur, Smyrna, Stone Mountain, Tucker, Snellville, Lilburn, Norcross, Peachtree Corners, Sugar Hill, Buford, Suwanee, and Dacula. Our comprehensive service area covers all five counties, providing consistent, professional dryer duct installation services across the entire metro Atlanta region.

Why Choose Arcitech Logistics

Professional Ductwork Installation | Code-Compliant Rigid Metal Duct | Shortest Routing Paths | Lint-Fire Prevention Focus | Proper Duct Length Calculations | Sealed Smooth-Interior Duct | Minimal Elbow Configurations | Accessible Cleaning Access | Weather-Resistant Caps | Electric & Gas Dryer Expertise | Complete Testing & Verification | Same-Day Service Available | Serving Atlanta Metro Since 2015 | Licensed and Insured | Gwinnett, DeKalb, Cobb, Fulton & Forsyth Counties | Upfront Pricing - No Hidden Fees | Professional Installation Guarantee

Requirements

Measure distance from dryer to nearest exterior wall | Verify dryer type (electric or gas) | Check if existing duct needs replacement (flexible plastic/foil is illegal) | Ensure wall/ceiling access available for duct routing | Clear path from dryer location to exterior wall | Identify any obstacles (studs, plumbing, electrical) between dryer and exterior | Verify dryer location has adequate clearance for installation work | Confirm exterior wall access (no landscaping or structures blocking vent cap location) | Have recent dryer model/brand information available | Note any previous issues with drying times or dryer performance | Ensure someone 18+ is home during entire installation | Provide adequate parking for service vehicle | Allow 2-4 hours for standard installation (more for complex second-floor routing) | Dryer should be pulled away from wall for access | Power should be accessible to run dryer for testing

Services Provided

Duct Installation Types: Electric Dryer Duct - Standard 4-inch exhaust ductwork | Gas Dryer Duct - Code-compliant gas dryer exhaust systems | First-Floor Dryer Duct - Ground-level laundry room venting | Second-Floor Dryer Duct - Upstairs laundry room exhaust routing | Closet Dryer Duct - Space-efficient closet dryer installations | Stacked Dryer Duct - Washer/dryer stack unit venting | Garage Dryer Duct - Unfinished space dryer installations

Duct Materials and Configurations: Rigid Aluminum Duct - Semi-rigid or rigid aluminum 4-inch duct | Rigid Galvanized Steel Duct - Heavy-duty steel dryer duct | Smooth Interior Duct - Low-resistance interior preventing lint buildup | 4-Inch Round Duct - Standard dryer duct size | Short Run Installation - Minimizing duct length for efficiency | Long Run Installation - Extended ductwork for challenging locations | Elbow Minimization - Reducing turns for maximum airflow | Fire-Rated Duct - Commercial or high-risk application ductwork

Duct Routing and Configuration: Wall Vent Termination - Exhaust through exterior wall | Roof Vent Termination - Exhaust through roof (when necessary) | Crawl Space Routing - Running ductwork through crawl spaces | Attic Routing - Running duct through attic to exterior | Multi-Story Routing - Vertical duct runs between floors | Horizontal Long Runs - Extended horizontal ductwork | Behind-Wall Routing - Concealed ductwork in wall cavities

Exterior Terminations and Accessories: Wall Cap Installation - Exterior vent cap with damper | Pest Guard Cap - Screen or louver preventing pest entry | Dampered Vent Cap - Self-closing flap preventing backdraft | Ground-Level Termination - Low exterior wall venting | Periscope Vent Box - Zero-clearance dryer vent systems | 4-Way Vent Box - Multi-direction venting for tight spaces

Code Compliance and Safety Features: Rigid Metal Duct - Code-required rigid or semi-rigid metal duct | Maximum Length Compliance - Following 25-35 foot maximum length codes | Elbow Deduction - Proper duct length calculation | Smooth Interior - Preventing lint accumulation | Sealed Joints - Aluminum tape or clamps | Accessible Cleanout - Maintenance access for duct cleaning | Fire Damper Installation - Required penetrations through fire-rated walls/floors

What's Included

Initial Assessment and Planning: Contact customer scheduling dryer duct installation | Verify dryer type (electric or gas) | Ask for photos of dryer location and exhaust area | Review existing duct configuration | Identify shortest path to exterior wall | Assess obstructions (studs, plumbing, electrical, HVAC) | Measure distance from dryer to exterior | Count potential elbows required for routing | Calculate total equivalent duct length with elbow penalties | Verify duct length within code limits (25-35 feet maximum) | Discuss exterior wall material (siding, brick, stucco, concrete) | Review crawl space or attic access if needed | Identify dryer vent outlet location (rear, side, bottom) | Discuss aesthetic considerations for visible ductwork | Verify gas line location if gas dryer (safety clearance) | Ask about previous dryer performance issues (slow drying, overheating) | Discuss lint buildup and cleaning access | Review timeline and laundry usage during installation | Provide estimated installation time | Answer pre-installation questions | Confirm appointment date and time | Provide contractor contact information | Verify customer available during work | Discuss parking and equipment access | Review any HOA or permit requirements | Confirm dryer specifications (vent outlet location and size) | Verify all duct materials will be provided | Discuss warranty coverage and service guarantees | Review safety protocols (especially gas dryers) | Confirm customer understands proper dryer operation and maintenance

Installation Process: Remove old duct if replacing | Cap or seal existing wall penetration if rerouting | Mark new duct routing path | Determine all materials needed (duct, elbows, cap, tape) | Gather all installation materials | Prepare work area and protect flooring | Install proper backing/support for exterior cap | Cut exterior wall penetration (4-inch hole saw) | Install exterior wall cap with damper | Run rigid metal duct from dryer to exterior | Secure duct with strapping every 4 feet maximum | Connect all duct sections with aluminum tape (no screws inside duct) | Verify all joints sealed | Install dryer connection transition (semi-rigid or rigid) | Test airflow by running dryer | Check exterior cap opens during dryer operation | Verify no air leaks at joints | Clean up work area | Walk customer through completed installation | Educate customer on proper maintenance

Specifications & Safety

Dryer Duct Technical Specifications: Duct Diameter: 4 inches (100mm) standard for all residential dryers | Duct Material: Rigid aluminum or galvanized steel (rigid or semi-rigid metal required by code) | Maximum Equivalent Length: 25-35 feet (per dryer manufacturer specs and local building codes) | Elbow Equivalent Lengths: 90-degree elbow = 5 feet equivalent, 45-degree elbow = 2.5 feet equivalent | Maximum Number of Elbows: Typically 2-4 depending on total equivalent length | Interior Surface: Smooth (rigid metal) - no ridges that collect lint | Joint Sealing: Aluminum foil tape or clamps (NO sheet metal screws inside duct - catches lint) | Support Spacing: Maximum 4 feet between duct straps/hangers | Exterior Cap: Dampered vent cap with minimum 12-inch clearance from grade | Cap Opening: Minimum 12.25 sq inches (meets typical dryer exhaust requirements) | Slope: Slight downward slope toward exterior preferred for moisture drainage | Wall Penetration: 4-inch diameter hole with cap sealed around perimeter | Fire Damper: Required when duct penetrates fire-rated assemblies per code | Periscope Box Depth: 2-3 inches (vs. standard elbow requiring 8+ inches) | Booster Fan: Inline fan rated for dryer exhaust service (when equivalent length exceeds limit) | Gas Dryer: Same duct specs as electric dryer - no special duct type required (same metal requirement)

Additional Charges

Roof Vent Termination: Add $125-$195 - Roof penetration with proper flashing when wall vent not feasible | Periscope Vent Box: Add $85-$145 - Zero-clearance vent box for tight dryer spaces allowing dryer to sit flush to wall | Booster Fan Installation: Add $275-$425 - Inline fan increasing airflow for extended duct runs exceeding recommended length | Second-Floor Routing: $375-$550 - Additional labor for vertical routing through floor/ceiling with fire damper if required | Ceiling/Wall Repair: Varies - Patching and painting after installation if wall or ceiling penetration required | Brick/Concrete Penetration: Add $75-$125 - Additional cost for penetrating masonry exteriors vs standard siding | Crawl Space Access: Add $50-$100 - Additional labor for routing duct through crawl space | Attic Access: Add $75-$150 - Additional labor for routing duct through attic space

Our Professional Process

Step 1 - Schedule & Assessment: Contact us to schedule dryer duct installation. Provide dryer type (electric/gas), location, and current duct situation. We'll discuss your specific needs and provide upfront pricing.

Step 2 - Site Evaluation: Technician arrives and evaluates dryer location, identifies shortest path to exterior, measures duct length, counts required elbows, calculates equivalent length, assesses wall materials, and confirms all materials available.

Step 3 - Material Preparation: Gather all required materials including rigid aluminum or galvanized steel duct sections, elbows, exterior wall cap with damper, aluminum tape, duct clamps, strapping, and any periscope boxes needed.

Step 4 - Old Duct Removal (if replacing): Remove existing flexible plastic or foil duct (illegal material). Cap old wall penetration if rerouting. Inspect for lint buildup or damage in existing wall cavities.

Step 5 - Exterior Penetration: Cut 4-inch hole through exterior wall at selected vent location. Install exterior vent cap with damper. Seal around cap perimeter with appropriate caulk for weatherproofing.

Step 6 - Duct Installation: Run rigid metal duct sections from dryer location to exterior cap. Connect sections with aluminum tape (not screws - screws catch lint). Secure duct with strapping every 4 feet. Minimize elbows. Maintain downward slope where possible for lint flow.

Step 7 - Dryer Connection: Install semi-rigid aluminum transition connecting dryer vent outlet to rigid duct (maximum 8 feet of semi-rigid). Ensure no kinks or restrictions at dryer connection.

Step 8 - Testing & Verification: Run dryer for full cycle. Verify exterior cap opens during operation. Check all connections for air leaks. Confirm proper airflow. Measure exhaust at exterior cap.

Step 9 - Customer Education: Walk customer through completed installation. Explain maintenance requirements (lint screen cleaning, annual duct cleaning). Demonstrate how to check exterior vent cap. Provide care instructions.

Preparation

Before Dryer Duct Installation: Measure distance from dryer to nearest exterior wall | Verify dryer type (electric or gas) | Check if existing duct needs replacement - flexible plastic/foil duct is ILLEGAL and dangerous | Ensure wall/ceiling access available for duct routing | Pull dryer away from wall to allow access | Clear path from dryer to exterior wall of obstructions | Identify existing wall penetration location (if replacing) | Note any previous drying issues (slow drying, overheating, burning smell) | Have dryer model/brand information ready | Ensure someone 18+ is home for entire installation | Arrange for parking near home entrance | Remove items stored on top of or around dryer | If replacing existing duct, note where old duct exits building

Testing & Quality Assurance

Post-Installation Testing Protocol: Run dryer through complete cycle to test ductwork under real conditions | Verify exterior vent cap damper opens fully during dryer operation (check from outside) | Inspect all duct connections for air leaks (feel for escaping air along entire duct run) | Confirm proper airflow at exterior vent cap outlet | Check for lint discharge at exterior cap (normal - confirms airflow) | Verify dryer duct connection is secure with no gaps | Inspect periscope box connection if installed | Verify duct strapping secure and duct properly supported | Check for any condensation at duct connections | Ensure exterior vent cap closes fully when dryer not running (prevents backdraft and pest entry) | Verify duct does not touch gas line or flue (minimum clearance) | Confirm duct route is shortest practical path | Check equivalent duct length is within code limits | Ensure all aluminum tape connections are secure | Verify duct exterior cap caulked and weatherproofed | Walk customer through exterior cap location and operation | Demonstrate how to check if dryer is venting properly (exterior cap opens during operation) | Provide customer with maintenance schedule and care instructions

Service Areas

Gwinnett County: Lawrenceville, Duluth, Norcross, Lilburn, Snellville, Dacula, Buford, Suwanee, Sugar Hill, Peachtree Corners | DeKalb County: Decatur, Tucker, Stone Mountain, Chamblee, Dunwoody, Brookhaven | Cobb County: Marietta, Smyrna, Kennesaw, Acworth, Austell, Powder Springs, Mableton | Fulton County: Atlanta, Alpharetta, Roswell, Sandy Springs, Johns Creek, Milton, East Point | Forsyth County: Cumming

Coverage Details

Gwinnett County Georgia: Lawrenceville, Duluth, Norcross, Lilburn, Snellville, Dacula, Buford, Suwanee, Sugar Hill, Peachtree Corners, Grayson, Loganville, Auburn, Braselton | DeKalb County Georgia: Decatur, Tucker, Stone Mountain, Chamblee, Dunwoody, Brookhaven, Clarkston, Lithonia, Conyers | Cobb County Georgia: Marietta, Smyrna, Kennesaw, Acworth, Austell, Powder Springs, Mableton, Vinings | Fulton County Georgia: Atlanta, Alpharetta, Roswell, Sandy Springs, Johns Creek, Milton, East Point, College Park, Fairburn, Hapeville, Union City | Forsyth County Georgia: Cumming, South Forsyth

Frequently Asked Questions

Q: What type of duct is required for dryers? A: ALL dryer exhaust ducts MUST be rigid or semi-rigid METAL. Flexible plastic or foil duct is ILLEGAL and a major fire hazard. Acceptable materials include rigid aluminum duct (most common, lightweight, corrosion-resistant, smooth interior), rigid galvanized steel duct (stronger, better for long runs), and semi-rigid aluminum (only for short transitions, not entire runs). 4-inch diameter is standard for all residential dryers.

Q: How long can my dryer duct be? A: Most codes limit dryer duct to 25-35 feet total equivalent length. Calculate equivalent length: straight duct = 1 foot per foot, each 90-degree elbow = 5 feet equivalent, each 45-degree elbow = 2.5 feet equivalent. Example: 15 feet straight + two 90-degree elbows = 25 feet equivalent. Shorter runs are more efficient. Long runs cause reduced airflow, longer drying times, more lint buildup, and potential overheating. Solutions: minimize elbows, use smooth rigid duct, consider relocating dryer, or install inline booster fan.

Q: Should I vent my dryer through the roof or wall? A: Wall venting is strongly preferred. Advantages: shortest duct run, gravity assists lint removal, easier maintenance, lower cost, less condensation. Roof venting only when wall venting is physically impossible. Disadvantages of roof venting: longer run, lint tends to settle, more condensation risk, more expensive, difficult to clean, potential for roof leaks. We always recommend wall venting when possible.

Q: Can I use flexible duct for my dryer? A: Flexible plastic or foil duct is NEVER acceptable for dryer venting - it is illegal, a fire hazard, and collects lint in ribbed interior. Semi-rigid aluminum duct is acceptable ONLY for short transitions (maximum 8 feet) from dryer to rigid duct. All main duct runs must be rigid metal. We only install code-compliant rigid or semi-rigid metal duct.

Q: Why is my dryer taking so long to dry clothes? A: Most common causes: clogged/restricted duct (lint buildup, long runs, multiple elbows), crushed or kinked duct behind dryer, too many elbows reducing airflow, duct exceeding maximum length, clogged lint screen, stuck or clogged exterior vent cap, or dryer mechanical issues. We inspect entire duct system, replace improper ductwork, clean clogged ducts, and shorten runs when possible.

Q: How often should I have my dryer duct cleaned? A: Average household (4-6 loads/week): every 1-2 years. Large household (8+ loads/week): annually. Light use: every 2-3 years. Clean more frequently with long duct runs, multiple elbows, second-floor location, heavy fabric softener use, or pet ownership. Signs duct needs cleaning: longer drying times, very hot dryer, burning smell, lint around exterior vent cap, dryer shutting off early.

Q: Can you install dryer vent for second-floor laundry room? A: Yes, second-floor dryer duct installation is a common service. We typically route duct down through floor to exterior wall, or horizontally through wall cavities. Challenges include longer runs, more elbows, potential condensation, and possible fire damper requirements. Cost: $375-$550 depending on routing complexity.

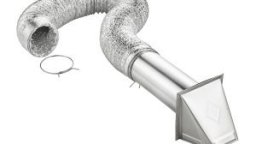
Q: What is a periscope vent box and do I need one? A: A periscope vent box is a flat aluminum box allowing dryer to sit only 2-3 inches from wall (vs. 8+ inches with standard round duct elbow). Needed for tight spaces like closets, small laundry rooms, or stacked units. Installation adds $85-$145 to duct cost.

Q: Is there a difference between gas and electric dryer venting? A: Duct requirements are the same (4-inch rigid metal), but gas dryers require more stringent code compliance since exhaust contains combustion byproducts including carbon monoxide. Gas dryers must NEVER use recirculating or indoor venting kits. We install carbon monoxide detectors are recommended in homes with gas dryers. We understand and follow all code differences.

Q: How much does dryer duct installation cost? A: Standard short run (under 15 feet): $195-$325. Long run (15-25 feet): $295-$475. Second-floor routing: $375-$550. Flexible duct replacement: $175-$295. Additional costs: roof vent add $125-$195, periscope box add $85-$145, booster fan add $275-$425. Final cost depends on duct length, number of elbows, routing difficulty, and exterior material.

Service Areas

We provide Professional Dryer Duct Installation in Atlanta Metro Area throughout the Atlanta Metro area including:

Gwinnett County

  • Lawrenceville
  • Duluth
  • Suwanee
  • Buford
  • Norcross
  • Lilburn
  • Snellville

DeKalb County

  • Decatur
  • Dunwoody
  • Tucker
  • Stone Mountain
  • Chamblee
  • Brookhaven

Cobb County

  • Marietta
  • Smyrna
  • Kennesaw
  • Acworth
  • Powder Springs
  • Austell

Fulton County

  • Atlanta
  • Alpharetta
  • Sandy Springs
  • Roswell
  • Johns Creek
  • Milton

Forsyth County

  • Cumming
  • Suwanee

Contact Information

Need professional dryer duct installation? From standard installations to complex second-floor routing, we ensure code-compliant, safe, efficient dryer venting. Phone: (678) 656-9246 | Email: arcitechlogistics@gmail.com | Serving Gwinnett, DeKalb, Cobb, Fulton, and Forsyth Counties since 2015. Professional installation, code-compliant ductwork, same-day service available. Call now!

Next Steps

After Dryer Duct Installation: Clean lint screen before EVERY load (most important maintenance task) | Schedule professional dryer duct cleaning every 1-2 years (annually for heavy use households) | Check exterior vent cap quarterly - ensure damper opens freely during dryer operation | Monitor for signs of venting problems: longer drying times, very hot dryer, burning smell | If dryer performance decreases, call us immediately for inspection | Do NOT use flexible plastic or foil duct if replacing any sections yourself (illegal - call us) | Keep area around dryer clear for air circulation | Do not store items on top of dryer that could fall and restrict duct | For gas dryers: install carbon monoxide detectors on all floors and check batteries annually | Report any burning smell immediately (sign of lint fire risk) | Schedule annual dryer and duct inspection for gas dryer installations | Keep vent cap exterior clear of snow, debris, and vegetation | Contact us for dryer duct cleaning at (678) 656-9246 | Save our contact information for future service needs | Refer friends and family for professional dryer duct installation services

Ready to Book?

Call or text us — we're available Mon–Sat, 8am–6pm.

(678) 656-9246
arcitechlogistics@gmail.com

Business Hours

  • Monday - Friday:
  • Saturday:
  • Sunday: Closed

Emergency Service Available: Call (678) 656-9246

Why Choose Arcitech Logistics

Licensed & Insured Fully certified technicians
Same-Day Service Available across Atlanta Metro
10+ Years Experience Established since 2015
Free Estimates No hidden fees

Important Information

Thank you for choosing Arcitech Logistics for your dryer duct installation! Proper dryer venting ensures safe, efficient operation, prevents lint fires, and reduces energy costs.

Before installation: Measure distance from dryer to exterior wall | Verify dryer type (electric or gas) | Check if existing duct needs replacement (flexible plastic/foil is illegal!) | Ensure wall/ceiling access available | Pull dryer away from wall for technician access

During installation: Code-compliant rigid metal duct installed | Shortest practical route to exterior | All connections properly sealed with aluminum tape | Complete testing ensures proper airflow | Exterior cap installed and weatherproofed

After installation: Clean lint screen before EVERY load | Schedule professional duct cleaning every 1-2 years | Check exterior vent cap quarterly (ensure damper opens) | Call us immediately if drying times increase dramatically | For gas dryers: ensure carbon monoxide detectors are installed and working

Questions? Call us at (678) 656-9246 | Email: arcitechlogistics@gmail.com

Arcitech Logistics - Professional Installation Services Since 2015

Ready to Schedule Your Professional Dryer Duct Installation in Atlanta Metro Area?

Same-day service available across the Atlanta Metro area.
Licensed & insured — satisfaction guaranteed.

(678) 656-9246
— or —
arcitechlogistics@gmail.com