Arcitech Logistics provides professional ceiling fan installation services throughout the Atlanta metro area, covering Gwinnett County, DeKalb County, Cobb County, Fulton County, and Forsyth County. Since 2015, our certified electricians have been installing and replacing ceiling fans for homeowners across metro Atlanta. Whether you're installing a new ceiling fan, replacing an outdated model, or upgrading to a modern smart fan with remote control, our experienced technicians ensure proper electrical connections, secure mounting, precise balancing, and safe operation.
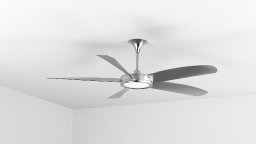
Ceiling fans are one of the most effective and energy-efficient ways to improve home comfort in Atlanta's hot summers and mild winters. Properly installed ceiling fans circulate air, reduce air conditioning costs, provide gentle winter heating assistance when reversed, and add aesthetic value to rooms. Professional installation ensures fans are mounted to fan-rated electrical boxes capable of supporting dynamic weight and vibration, wired correctly for safe operation, balanced to prevent wobbling, and configured for optimal performance. Our team understands electrical requirements, structural support needs, and installation best practices specific to ceiling fan systems.
We serve residential clients throughout the greater Atlanta area, including Lawrenceville, Duluth, Marietta, Alpharetta, Cumming, Roswell, Johns Creek, Sandy Springs, Decatur, Smyrna, Stone Mountain, Tucker, Snellville, Lilburn, Norcross, Peachtree Corners, Sugar Hill, Buford, Suwanee, and Dacula. Our comprehensive service area covers all five counties, providing consistent, professional ceiling fan installation services across the entire metro Atlanta region.
Why Choose Arcitech Logistics
Licensed Electrical Expertise: Our certified electricians understand ceiling fan electrical requirements, proper wiring techniques, and National Electrical Code compliance. We ensure safe, code-compliant installations.
Fan-Rated Box Installation: We never install ceiling fans on inadequate electrical boxes. We verify box ratings and install fan-rated boxes with proper ceiling support when needed—critical for safety.
Proper Balancing: We ensure fans operate smoothly without excessive wobble. Our technicians use professional balancing techniques, eliminating annoying vibration and noise.
Structural Understanding: We know how to locate ceiling joists, install brace bars, and ensure fans are securely supported. Improper support can result in fan falling—we prevent this.
All Fan Types Installed: From basic fans to smart WiFi fans, outdoor fans, and large high-ceiling fans, we have experience with all brands, models, and configurations.
Smart Home Integration: We configure smart fans with WiFi, set up apps, connect to Alexa/Google Home, and program automation for seamless smart home operation.
Proper Downrod Selection: We install appropriate downrod lengths for your ceiling height, ensuring optimal airflow and code-compliant blade clearance.
Three-Way Wiring Expertise: Need fan controllable from multiple switches? We install three-way switches and complex wiring configurations professionally.
Sloped Ceiling Expertise: Vaulted and cathedral ceilings require special mounting adapters. We properly install fans on angled ceilings maintaining motor level orientation.
Complete Testing: We don't just mount and leave—we test all speeds, reverse function, light operation, and verify everything works perfectly before leaving.
Same-Day Service Available: Many ceiling fan installations completed same day or next day. We understand Atlanta's heat and want your fan running quickly.
90-Day Installation Warranty: Our workmanship is warranted. If installation-related issues occur, we return to correct them at no charge.
Requirements
Before Installation Day:
- Purchase and receive ceiling fan (verify all parts included against parts list)
- Clear area below installation location (furniture, decorations, breakables)
- Provide clear path from entrance to installation room
- Verify ladder access if fan is upstairs (clear stairway)
- Secure pets in separate area during installation
- Note location of electrical breaker panel
- Have step stool available for technician if ceilings under 9 feet
Ceiling Height and Room Size Verification:
- Measure ceiling height from floor to ceiling
- Measure room length and width to calculate square footage
- Verify adequate ceiling clearance (7 feet minimum from floor to blade bottom)
- Confirm fan size is appropriate for room size
Electrical Requirements Verification:
- Verify existing ceiling fixture has electrical power
- Test light switch operation (if replacing existing fixture)
- Note if you want separate controls for fan and light
- Verify attic access is available (if fan-rated box installation might be needed)
- Check that electrical breaker panel is accessible and labeled
Control Preference Decisions:
- Decide on control type: wall switch, pull chains, remote, or smart/WiFi
- Determine if separate fan and light controls desired
- For smart fans, verify WiFi network name and password available
- Consider if voice control integration desired (requires compatible smart home system)
Services Provided
1. Standard Ceiling Fan Installation - Traditional ceiling fans with 3-5 blades for bedrooms, living rooms, and dining areas
2. Ceiling Fan with Light Kit - Fans with integrated light fixtures, combining illumination and air circulation
3. Remote Control Ceiling Fan - Fans with handheld remote controls for convenient operation
4. Smart WiFi Ceiling Fan - App-controlled fans with WiFi connectivity, voice control, and smart home integration
5. Large Ceiling Fan Installation - 60-72 inch fans for great rooms, vaulted ceilings, and large spaces
6. Small Ceiling Fan Installation - 29-44 inch fans for bathrooms, closets, hallways, and compact rooms
7. Outdoor Ceiling Fan Installation - Weather-resistant fans for covered patios, porches, and outdoor living areas
8. Indoor/Outdoor Rated Fans - Damp-rated fans suitable for both indoor and covered outdoor use
9. Ceiling Fan Replacement - Removing old fans and installing new ceiling fans
10. Hugger Ceiling Fan Installation - Low-profile flush-mount fans for rooms with low ceilings (under 8 feet)
11. Downrod Ceiling Fan Installation - Fans with extension downrods for high ceilings (9+ feet)
12. Sloped Ceiling Fan Installation - Fans with angled mounting for vaulted or cathedral ceilings
13. Dual Motor Ceiling Fan - Fans with two separate motors for enhanced airflow
14. Ceiling Fan with Retractable Blades - Modern fans with blades that retract when not in use
15. Industrial Ceiling Fan Installation - High-volume, low-speed (HVLS) fans for workshops and garages
16. DC Motor Ceiling Fan Installation - Energy-efficient DC motor fans (up to 70% more efficient than AC motors)
17. Cage-Style Ceiling Fan Installation - Industrial/rustic fans with protective blade cages
18. Designer Ceiling Fan Installation - High-end decorative fans from premium brands
19. Bedroom Ceiling Fan Installation - Quiet operation fans ideal for sleeping areas
20. Kitchen Ceiling Fan Installation - Fans suitable for kitchen environments
21. Bathroom Ceiling Fan Installation - Moisture-resistant fans for bathrooms
22. Three-Way Switch Installation - Wiring fans to work with multiple wall switches
23. Fan/Light Combo Control - Separate controls for fan and light functions
24. Ceiling Fan Balancing - Correcting wobbling and vibration in existing fans
25. Fan-Rated Electrical Box Installation - Upgrading inadequate boxes to support ceiling fan weight
What's Included
Pre-Installation Consultation: Contact customer to confirm appointment, verify fan delivered with all parts, discuss ceiling height and type, control preferences (wall switch, pull chain, remote, smart/WiFi), and existing wiring configuration.
Technician Arrival and Assessment: Review installation scope, inspect new fan package, verify components, measure ceiling height and room dimensions, test existing fixture, turn off power at breaker, verify power off with voltage tester, inspect electrical box type and fan-rating.
Old Fixture or Fan Removal (if replacing): Photograph existing wiring, disconnect canopy, disconnect all wire connections (hot, neutral, ground), remove old fan/fixture and mounting bracket.
Fan-Rated Electrical Box Installation (if needed): Verify if existing box is fan-rated; if not, install ceiling brace bar and new fan-rated electrical box capable of supporting 50+ pounds dynamic weight.
Ceiling Fan Assembly: Assemble motor housing, blades, brackets, downrod, canopy, and light kit per manufacturer instructions. Select appropriate downrod length for ceiling height.
Electrical Wiring Connections: Connect ground wires first, then neutral wires, then hot wires to black and blue fan wires. Install wire nuts and wrap with electrical tape. Route wires neatly into electrical box.
Fan Mounting and Final Assembly: Hang fan from mounting bracket, secure canopy to ceiling, install light bulbs and globes, program remote control, connect smart fan to WiFi.
Power-On Testing and Balancing: Turn on circuit breaker, test all fan speeds, check for noise or wobble, test reverse function, test light kit, test remote/app control. Balance fan if wobble exceeds 1/4 inch.
Customer Demonstration: Demonstrate all controls, explain seasonal direction change (counterclockwise summer, clockwise winter), show blade cleaning procedure, explain maintenance.
Final Quality Check and Cleanup: Verify all connections secure, fan balanced and quiet, all controls working, collect packaging, dispose of old fixture, sweep work area, provide customer with manual and spare parts.
Specifications & Safety
Ceiling Fan Size Guide (Blade Span to Room Size):
- Up to 75 sq ft: 29-36 inch fan (small bedrooms, bathrooms, hallways)
- 76-144 sq ft: 36-42 inch fan (bedrooms, home offices)
- 144-225 sq ft: 44-50 inch fan (master bedrooms, living rooms)
- 226-400 sq ft: 50-54 inch fan (great rooms, large bedrooms)
- Over 400 sq ft: 54-72 inch fan (very large spaces, may need multiple fans)
Ceiling Height and Downrod Requirements:
- Standard 8 ft ceiling: Flush-mount hugger fan or 4-inch downrod (7-7.5 ft blade clearance)
- 9 ft ceiling: Standard downrod 4-6 inches (8-8.5 ft blade clearance)
- 10 ft ceiling: Extended downrod 12 inches (approximately 8.5 ft clearance)
- 11 ft ceiling: Extended downrod 24 inches
- 12 ft ceiling: Extended downrod 36 inches
- 14+ ft ceiling: Long downrod 48-72 inches
- Minimum blade clearance from floor: 7 feet (NEC requirement)
- Optimal blade clearance: 8-9 feet for maximum airflow efficiency
- Blade to ceiling distance: 10-12 inches optimal for airflow
Electrical Requirements:
- Voltage: Standard 120V household current
- Fan-rated electrical box required: minimum 35 lbs static rating, 70 lbs preferred
- Wire gauge: 14 AWG minimum for 15-amp circuit, 12 AWG for 20-amp circuit
- Ground wire required for proper fan grounding
- Separate fan and light control requires 3-conductor wire (black, white, blue, ground)
- Three-way switching requires 3-way switches and traveler wire
Motor Types and Energy Consumption:
- AC motor: 60-90 watts typical, 3 speed settings, lower cost
- DC motor: 15-30 watts typical, 6-7 speed settings, 70% more efficient
- ENERGY STAR certified fans: 60% more efficient than standard models
Blade Configuration:
- Blade pitch (angle): 12-15 degrees optimal for airflow (higher pitch moves more air)
- Blade count: 3, 4, or 5 blades (more blades = quieter, fewer blades = more airflow at high speed)
- Blade material: Wood, MDF, ABS plastic, or composite
- Outdoor/moisture-rated blade materials: ABS plastic, sealed/treated wood, composite
Moisture Ratings (for wet/humid locations):
- Dry rating: Indoor use only, controlled environment
- Damp rating: Enclosed areas with moisture (bathrooms, covered patios)
- Wet rating: Fully exposed outdoor locations with direct rain exposure
Additional Charges
Fan-Rated Electrical Box Installation - $95-$175: If existing ceiling box is not fan-rated (most light fixture boxes aren't), we install fan-rated box with proper ceiling support. Includes ceiling brace bar, fan-rated box, drywall cutting/repair, and professional installation. Essential for safety.
Extended Downrod Installation - $35-$75: For ceilings over 9 feet, extended downrods required for proper fan performance. Price varies by downrod length (12"-72"). Includes downrod, extended wiring, and installation.
Wall Switch Installation - $75-$125: Installing new wall switch when no existing wall control present. Includes switch, wall box, wire fishing from ceiling to switch location, drywall cutting/patching, and switch plate.
Separate Fan and Light Control - $125-$225: Running additional wire from fan to wall switches providing separate fan and light controls. Requires fishing additional wire, installing dual switch, and wiring both circuits.
Three-Way Switch Installation - $175-$295: Wiring fan to operate from two different wall switches. Includes two three-way switches, traveler wire between switches, complex wiring, and testing.
Dimmer Switch Installation - $45-$85: Installing dimmer switch compatible with ceiling fan light kit. Requires LED-compatible dimmer for modern fans.
Smart Fan WiFi Setup - $75-$125: Comprehensive smart fan configuration including WiFi connection, app installation, voice control integration (Alexa/Google), automation programming, and testing.
Sloped Ceiling Adapter - $45-$75: Installing angled ceiling adapter for vaulted or cathedral ceilings. Allows fan motor to remain level despite ceiling slope.
High Ceiling Installation - $95-$175: Fans requiring extension ladder or scaffolding for ceilings over 12 feet. Safety equipment and additional labor time required.
Old Fan Removal and Disposal - $45-$75: Removing old ceiling fan, disconnecting electrical, disposing of old fan. Included free if installing new fan in same location.
Remote Control Receiver Installation - $55-$85: Installing aftermarket remote control receiver in existing fan to add remote control capability.
Fan Balancing Service - $45-$75: Correcting excessive wobble in existing ceiling fan through professional balancing procedures.
Multiple Fan Installation Discount - 30% off per additional fan: Installing multiple ceiling fans in same visit receives significant per-fan discount.
After-Hours or Weekend Installation - 25-50% surcharge: Service requested outside normal business hours charged at premium rate.
Our Professional Process
Step 1 - Schedule and Consultation: Book your appointment online or by phone. We confirm your ceiling fan model, ceiling height and type, existing wiring, and control preferences during pre-installation consultation.
Step 2 - Technician Arrival: Our certified electrician arrives within the scheduled window, reviews installation scope, and inspects the new fan package for completeness and shipping damage.
Step 3 - Safety Preparation: Power is turned off at the breaker panel and verified off using a non-contact voltage tester. Work area is prepared with protective covering on floors.
Step 4 - Old Fixture Removal: Existing ceiling fixture or fan is removed. All wiring connections are photographed for reference before disconnecting. Old hardware is removed cleanly.
Step 5 - Electrical Box Verification/Upgrade: Existing electrical box is inspected for fan-rating. If not fan-rated, we install a ceiling brace bar and proper fan-rated electrical box capable of supporting ceiling fan weight and vibration.
Step 6 - Fan Assembly: Ceiling fan is assembled per manufacturer instructions including motor housing, blade brackets, blades, downrod (proper length for ceiling height), canopy, and light kit.
Step 7 - Mounting and Wiring: Fan is hung from mounting bracket. All electrical connections made: ground, neutral, and hot wires properly connected with wire nuts and electrical tape. Wires routed neatly into electrical box.
Step 8 - Final Assembly: Canopy secured to ceiling, light bulbs installed, remote control programmed, smart fan connected to WiFi network.
Step 9 - Testing and Balancing: Power restored, all fan speeds tested, light operation verified, remote/app control confirmed. Fan balanced if wobble detected.
Step 10 - Customer Training and Cleanup: Complete demonstration of all controls, explanation of seasonal direction change, blade cleaning tips. All packaging collected, old fixture disposed, work area cleaned thoroughly.
Preparation
Before your ceiling fan installation appointment, please complete the following:
1. Purchase and unbox your ceiling fan - verify all components are present against the parts list included in the box
2. Measure your room dimensions (length x width) and ceiling height to confirm you have the correct fan size
3. Clear the area directly below the installation location - move furniture, decorations, and fragile items
4. Provide a clear path from your entrance to the installation room for technician access
5. If fan is being installed upstairs, ensure stairway is clear for ladder access
6. Secure all pets in a separate room or area away from the installation area
7. Locate your electrical breaker panel and ensure it is accessible and labeled
8. Note if you have attic access above the fan installation location (helpful for electrical box work)
9. Decide on your preferred control type: wall switch only, pull chains, remote control, or smart/WiFi
10. If installing a smart/WiFi fan, have your WiFi network name and password readily available
11. Consider whether you want independent controls for the fan and light (requires additional wiring)
12. If replacing existing ceiling fan, you may optionally remove old fan yourself to save time
13. Verify there is electrical power at the ceiling fixture location (existing switch should control it)
Testing & Quality Assurance
Every ceiling fan installation includes comprehensive testing before we consider the job complete:
Power and Electrical Testing:
- Non-contact voltage tester used to verify power OFF before any wiring work
- Verify all wire connections secure before restoring power
- Check no exposed bare wire beyond wire nuts
- Confirm proper grounding of fan motor and housing
- Restore power at breaker panel and verify fan receives power
Fan Operation Testing:
- Test fan at all speed settings (low, medium, high)
- Listen for unusual noises at each speed (clicking, grinding, rubbing)
- Verify fan rotates smoothly at all speeds without hesitation
- Test fan reverse switch functionality (summer/winter direction change)
- Confirm fan changes direction correctly when reversed
- Verify pull chain operation for both fan speed and light (if applicable)
Light Kit Testing:
- Turn light on and off multiple times verifying reliable operation
- Verify all bulbs illuminate properly
- Test dimmer function if fan has dimmable light capability
- Check for light flickering or buzzing sounds
- Verify glass globes or shades are secure
Remote Control and Smart Feature Testing:
- Test remote control at multiple speeds from various room locations
- Verify remote range is adequate for room size
- Test light control via remote
- For smart fans: verify app connectivity on customer's smartphone
- Test voice control commands (Alexa/Google) if configured
- Confirm WiFi connection is stable
Wobble and Balance Testing:
- Visually assess fan wobble at all operating speeds
- Acceptable wobble: less than 1/4 inch blade movement
- If excessive wobble detected, perform professional balancing procedure
- Retest after any balancing adjustments
- Confirm fan operates quietly without rattling or vibration
Final System Verification:
- Verify wall switch controls fan and/or light as expected
- Confirm blade clearance from floor meets 7-foot minimum
- Check canopy is flush against ceiling with no gaps
- Verify all blades are tight and evenly spaced
- Final listening test for any unusual sounds during operation
Fulton County: Atlanta, Alpharetta, Roswell, Sandy Springs, Johns Creek, Milton, East Point, College Park, Fairburn, Hapeville, Mountain Park, Union City
Forsyth County: Cumming
Coverage Details
Arcitech Logistics provides professional ceiling fan installation throughout the greater Atlanta metro area, serving five counties:
Gwinnett County (Primary Service Area):
Lawrenceville, Duluth, Norcross, Lilburn, Snellville, Grayson, Loganville, Dacula, Buford, Suwanee, Sugar Hill, Peachtree Corners, Berkeley Lake, Rest Haven, Braselton
DeKalb County:
Decatur, Tucker, Stone Mountain, Clarkston, Avondale Estates, Chamblee, Doraville, Dunwoody, Brookhaven, Lithonia, Pine Lake, Stonecrest
Fulton County:
Atlanta, Alpharetta, Roswell, Sandy Springs, Johns Creek, Milton, East Point, College Park, Fairburn, Hapeville, Mountain Park, Union City
Forsyth County:
Cumming
Service Area Notes:
- Same-day and next-day appointments often available throughout entire service area
- No additional travel charges within our standard service coverage area
- Serving Atlanta metro residential customers since 2015
- All five counties covered with consistent, professional service quality
Frequently Asked Questions
Q1: How do I know what size ceiling fan I need for my room?
A: Match fan blade span to room size. Up to 75 sq ft: 29-36 inch fan. 76-144 sq ft: 36-42 inch fan. 144-225 sq ft: 44-50 inch fan. 226-400 sq ft: 50-54 inch fan. Over 400 sq ft: 54-72 inch fan. Measure room length x width for square footage. Oversized fans are better than undersized—they move more air at lower speeds (quieter operation).
Q2: Can you install a ceiling fan where there's currently no fixture?
A: Yes, but requires running new electrical wiring from existing circuit to fan location. More complex than replacing existing fixture. Cost $275-$450 depending on distance and difficulty. Most Atlanta homes have attic access making new wiring straightforward.
Q3: Will a ceiling fan work without a light kit?
A: Yes, fans operate fine without integrated lighting—they're purely for air circulation. However, if removing existing ceiling light, you'll lose room lighting unless you add other lights. Best practice: choose fan with light kit when replacing ceiling light.
Q4: Can I install a ceiling fan on a vaulted or sloped ceiling?
A: Yes, with proper sloped ceiling adapter. Adapters handle slopes from 15-45 degrees. Fans on sloped ceilings typically require longer downrods for proper blade clearance. We assess your ceiling during consultation.
Q5: How much clearance is required between fan blades and floor?
A: Minimum 7 feet from floor to bottom of fan blades required by code. Optimal height is 8-9 feet. For standard 8 ft ceilings, use flush-mount hugger fan or very short downrod. For 9+ ft ceilings, use standard or extended downrod.
Q6: Can ceiling fans really help reduce energy costs?
A: Yes. Fans create wind-chill effect making room feel 4-8 degrees cooler, allowing thermostat to be raised 3-5 degrees. Each degree saves approximately 3% on cooling costs. Annual savings of $150-$300 realistic for Atlanta home with 3-4 ceiling fans.
Q7: Should ceiling fans run clockwise or counterclockwise?
A: Summer (counterclockwise looking up): creates downward airflow for cooling effect. Winter (clockwise looking up): creates upward airflow recirculating warm air from ceiling. Change direction twice yearly using reverse switch on motor housing.
Q8: Why does my ceiling fan wobble and how can it be fixed?
A: Common causes: loose screws, bent blade, uneven blade weight, inadequate electrical box. Fix: tighten all screws, measure blade heights, clean blades (dust causes imbalance), use balancing kit. Persistent wobble may indicate non-fan-rated electrical box.
Q9: Can ceiling fans be installed with dimmer switches?
A: For fan motor speed, use fan-specific speed controls only—never standard light dimmers on fan motors. For light kit dimming, standard LED-compatible dimmers work when fan and light circuits are on separate switches.
Q10: What's the difference between AC and DC motor ceiling fans?
A: AC motors: lower cost ($100-$300), 3 speeds, uses 60-90 watts. DC motors: 70% more efficient (15-30 watts), quieter, 6-7 speeds, longer lifespan (20+ years), higher cost ($250-$600). DC recommended for rooms where fans run extensively.
Q11: Can you install ceiling fan in bathroom or covered patio?
A: Yes. Bathrooms: use damp-rated fans, install away from direct water spray. Covered patios: use damp-rated fans. Open/exposed areas: use wet-rated fans with sealed motors and corrosion-resistant construction.
Q12: How long does ceiling fan installation take?
A: Standard replacement: 60-90 minutes. With fan-rated box upgrade: 90-150 minutes. New installation (no existing fixture): 150-240 minutes. Multiple fans: first fan 60-90 min, subsequent fans 45-60 min each. Smart fan setup adds 15-30 minutes.
Service Areas
We provide Professional Ceiling Fan Installation in Atlanta Metro Area throughout the Atlanta Metro area including:
Gwinnett County
Lawrenceville
Duluth
Suwanee
Buford
Norcross
Lilburn
Snellville
DeKalb County
Decatur
Dunwoody
Tucker
Stone Mountain
Chamblee
Brookhaven
Cobb County
Marietta
Smyrna
Kennesaw
Acworth
Powder Springs
Austell
Fulton County
Atlanta
Alpharetta
Sandy Springs
Roswell
Johns Creek
Milton
Forsyth County
Cumming
Suwanee
Contact Information
Ready to enjoy comfort and energy savings with a professionally installed ceiling fan? Contact Arcitech Logistics for expert ceiling fan installation throughout the Atlanta metro area.
Serving Gwinnett County, DeKalb County, Cobb County, Fulton County, and Forsyth County since 2015. Same-day appointments often available. Call now to schedule your ceiling fan installation!
Next Steps
After your ceiling fan installation is complete, here are your next steps for optimal performance and long-term reliability:
Immediate Post-Installation:
1. Test all fan functions yourself - speeds, light, remote/app control, and direction switch
2. Set fan to summer mode (counterclockwise rotation) if installation is during warm months
3. Set thermostat 3-4 degrees higher than normal to test energy savings with fan running
4. Register your ceiling fan with the manufacturer for warranty coverage
5. Save your purchase receipt and Arcitech Logistics invoice for warranty documentation
First Week:
6. Download fan app if smart fan and explore all features (voice control, scheduling, automation)
7. Program smart home integrations (Alexa routines, Google Home automations) as desired
8. Listen for any unusual sounds that may develop as fan "breaks in" - contact us if concerned
9. Check that all blade screws remain tight after first few days of operation
Seasonal Maintenance:
10. Clean fan blades quarterly with microfiber cloth (dust causes imbalance and wobble)
11. Change fan direction seasonally: counterclockwise in spring/summer, clockwise in fall/winter
12. Inspect and tighten all screws annually (blades, brackets, canopy, mounting)
13. Replace light bulbs as needed - always use correct wattage, LED recommended
Long-Term Care:
14. If wobble develops: clean blades first, then tighten screws, then use balancing kit
15. If noise develops: check for loose screws, blade hitting something, or motor issues
16. Never oil permanently-lubricated sealed bearing motors
17. Contact Arcitech Logistics for any installation-related issues within our 90-day warranty period
Thank you for choosing Arcitech Logistics for your ceiling fan installation!
Professional ceiling fan installation ensures safe electrical connections, secure mounting, proper balancing, and optimal performance for years of comfortable, energy-efficient operation.
Before installation:
- Verify all fan parts are included in box
- Measure your room and ceiling height
- Clear area below installation location
- Decide on control preferences (wall switch, remote, or smart)
- Have WiFi password ready (if smart fan)
During installation:
- We'll verify or install fan-rated electrical box
- Fan will be securely mounted to ceiling structure
- All electrical connections will be code-compliant
- Fan will be balanced for smooth operation
- Complete operation demonstration provided
After installation:
- Test fan at all speed settings
- Reverse fan direction seasonally (counterclockwise summer, clockwise winter)
- Clean blades quarterly to prevent dust buildup
- Contact us if wobbling, noise, or issues develop
- Enjoy energy savings and enhanced comfort!
Questions before your appointment? Call us at (678) 656-9246
We look forward to installing your ceiling fan with professional expertise!
Arcitech Logistics
Ceiling Fan Installation Experts Since 2015
Ready to Schedule Your Professional Ceiling Fan Installation in Atlanta Metro Area?
Same-day service available across the Atlanta Metro area. Licensed & insured — satisfaction guaranteed.