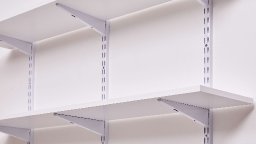
Our Professional Process
Phase 1 - Initial Consultation & Assessment: Schedule your consultation, conduct on-site structural assessment, review storage requirements, discuss design vision, measure wall dimensions, identify stud locations using electronic stud finders, test wall materials and strength, check for hidden utilities with pipe and wire detectors, evaluate load distribution requirements, assess room functionality, review existing storage systems, assess lighting conditions, photograph current space, create preliminary design plan, and provide detailed written estimate.
Phase 2 - Design Planning & Material Selection: Select appropriate shelf material (solid wood, plywood, MDF, metal, glass, wire, or composite), determine optimal shelf dimensions, choose mounting system (floating, bracket, track, built-in, or French cleat), select support brackets, plan shelf spacing for intended use, calculate weight capacity requirements, select finish and color, plan edge treatment, consider adjustability needs, plan integrated features like LED lighting or drawers, evaluate safety considerations, create detailed scale drawings, review code compliance, obtain client final approval, and order/prepare all materials.
Phase 3 - Pre-Installation Preparation: Clear work area, protect flooring with drop cloths, cover nearby furniture, clean wall surfaces, verify wall condition, mark stud locations precisely, establish level reference lines using laser levels, check ceiling and floor level at multiple points, verify electrical outlet clearances, check HVAC vent clearances, plan access routes, establish tool and supply station, prepare waste collection, brief household members, and conduct final safety check.
Phase 4 - Mounting Hardware Installation: Measure and mark bracket positions precisely, verify stud alignment, select appropriate mounting hardware for wall type, drill pilot holes, install first reference bracket, verify level, install second bracket, check spacing, install intermediate brackets, verify all brackets are aligned, install floating shelf hardware if applicable, test bracket strength, install track systems if applicable, install bracket hooks, prepare shelf material, apply edge treatment, drill holes for adjustable pins if needed, install shelf lighting if included, add anti-slip liner, and prepare for shelf placement.
Phase 5 - Shelf Installation & Leveling: Position first shelf carefully, center on brackets, check level at multiple points, secure shelf to brackets, install shelf backing if included, attach dividers, install lighting controls, add decorative trim elements, install subsequent shelves, verify vertical spacing consistency, check parallel alignment, install end caps, add edge molding, install drawer inserts if included, attach hooks and rods, apply finish touch-ups, install safety features, clean all surfaces, test shelf strength under graduated load, and verify all fasteners are properly tightened.
Phase 6 - Quality Assurance & Final Details: Conduct comprehensive visual inspection from multiple angles, photograph completed installation, test all shelves under load, check for shelf deflection, verify lighting function, test adjustability mechanisms, verify drawer operation, check safety feature security, clean work area thoroughly, remove all installation debris, restore furniture placement, conduct client walkthrough, provide load capacity documentation, share maintenance recommendations, demonstrate adjustability features, answer all questions, collect payment and provide receipt, schedule follow-up contact, request feedback, and provide warranty information.
Preparation
Wall Surface: Walls should be in reasonably good condition. Inform our technicians of any known damage, water stains, or structural concerns in installation areas. We will assess and advise on necessary repairs.
Furniture Clearance: Move furniture and wall decorations away from walls where shelves will be installed. Creating a clear 3-4 foot work zone allows efficient, safe installation.
Item Removal: Remove any items currently stored in closets or areas where new shelving will be installed. Clear the space completely to allow access for measurements and installation.
Utility Identification: Note the location of electrical panels, circuit breakers, shut-off valves, or other utility access points near installation areas. Inform our team of any known plumbing or electrical in installation walls.
Design Decisions: Have a general sense of your desired shelf style, material, and finish before installation day. Bring inspiration photos, material samples, or specific product specifications if you have preferences.
Lighting Decisions: If you want integrated LED lighting incorporated into your shelving, decide on lighting preferences (color temperature, dimmer control, plug-in vs hardwired) before installation so we can plan accordingly.
Children and Pets: Arrange for children and pets to be away from work areas during installation. Power tools, dust, and hardware create unsafe conditions for young children and curious pets.
Parking Access: Ensure adequate parking near your home for our service vehicle. We carry tools, materials, and equipment that require proximity to the work site.
Testing & Quality Assurance
Level Verification: Each shelf is tested with a precision spirit level at multiple points to confirm perfect horizontal alignment (less than 1/16 inch variation over 48 inches). Level shelves prevent items from sliding and ensure professional appearance.
Bracket Pull Test: Before placing shelves, each mounted bracket is tested by hand with firm downward and outward pressure to verify secure wall attachment. Any movement requires adjustment or reinforcement.
Graduated Load Test: Shelves are loaded incrementally to test structural integrity. We start with light weight and gradually increase to verify adequate support before completion. We check for any movement, creaking, or flexing in brackets or wall attachment points.
Deflection Check: Long shelves are inspected for sag or deflection under representative loads. Acceptable deflection is less than 1/4 inch over 48 inches of span. Excessive deflection indicates need for additional support.
Alignment Verification: All shelves in a multi-shelf installation are checked for parallel alignment using a long level or taut reference string. Consistent spacing between shelves is measured at multiple points.
Fastener Tightness Check: All mounting screws, bolts, and hardware connections receive a final tightness check to ensure nothing loosened during the installation process.
Safety Feature Test: Anti-tip straps are tested for secure attachment to wall studs. Edge guards are checked for adhesion. All safety components are verified functional.
Adjustability Test: For track and bracket systems, shelf adjustment mechanisms are tested by repositioning brackets to verify smooth movement and proper locking in standards.
Lighting Function Test: Integrated LED lighting is tested for proper illumination, even distribution, and correct switch or dimmer control operation.
Final Visual Inspection: Complete visual inspection from multiple angles and distances to verify level appearance, consistent spacing, proper centering, and professional finish quality throughout the entire installation.